
A Better Windows Shell 2/5: Font
Fonts might seem trivial at first, but once you learn about Nerd Fonts you won't be able to go back.

Welcome back, tech adventurers! Today, we'll dive into one of the most overlooked aspects of your terminal: the font.
You might be thinking, "A font? How much difference can that really make?" Well, let me introduce you to the world of Nerd Fonts, a game-changer for developers and tech enthusiasts alike.
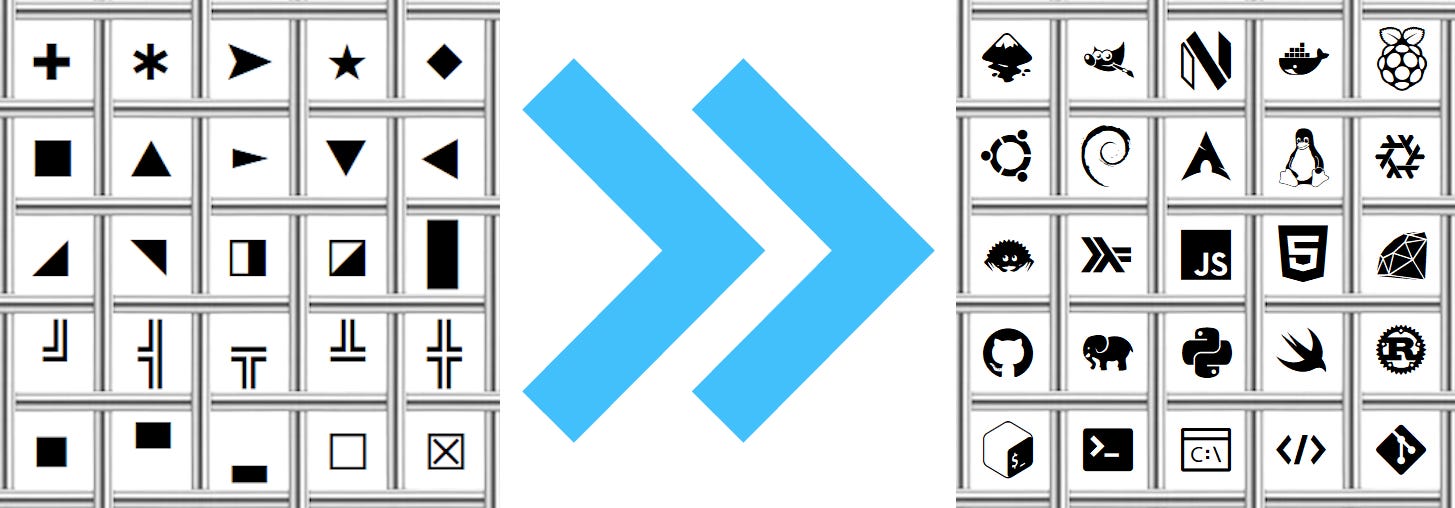
Nerd Fonts take your standard system fonts to the next level. They go beyond the basic Unicode characters and include an extensive collection of symbols, icons, and glyphs from various technical realms. With NerdFonts, you'll have access to a vast array of icons for file types, UI controls, and so much more.
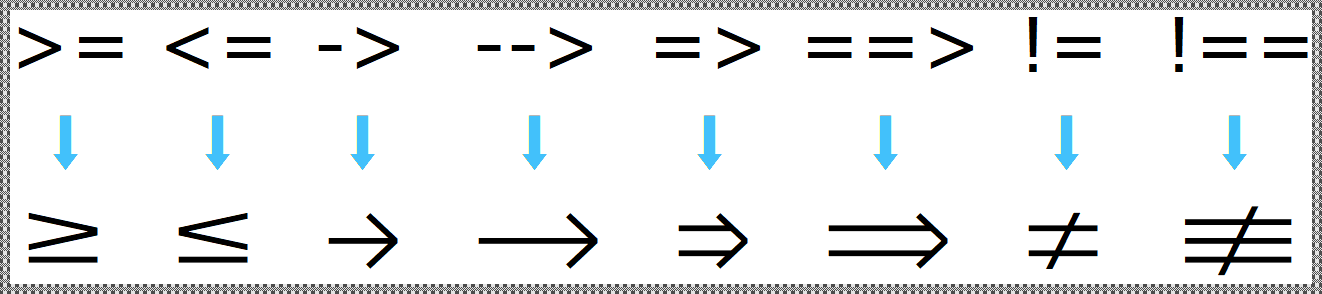
Many Nerd Fonts support ligatures; which combine multiple characters into a single glyph, making code more readable and visually appealing:
Say goodbye to using image files or ToyIcons, and hello to context-based rendering of code symbols.
Here are some recommendations for picking a font:
Choose one that includes ligatures
Compare legibility of characters like O0 Il1
Getting started with Nerd Fonts is easy as pie, just head over to nerdfonts.com and pick your favorite font! My personal favorite is Monoid Nerd Font Mono.
Once you have a font picked out just download and run the TrueType font file of your choice just as you would an .exe and Windows will run the font installation wizard. Once you get this set up your ready for the next step.
With Nerd Fonts, you'll unlock a new level of visual clarity and functionality in your terminal. Not only will your code be more readable, but you'll also have a wide range of glyphs and icons at your fingertips, making your development experience more enjoyable and efficient.
Give them a try and see how they transform your terminal. Trust me, once you go Nerd, you'll never go back!
Stay tuned for the next part of this series, where we'll explore even more exciting improvements for your Windows shell.
Until then, happy coding!
Previous Post: Part 1
Next Post: Part 3